The Best Ceiling Speaker Layout Calculators Online
August 30, 2025 at 1:00 pm,
No comments
Are you planning to install ceiling speakers in your home theater, living room, or commercial space? Proper speaker placement is crucial for achieving optimal sound quality and immersive audio experiences. However, figuring out the ideal ceiling speaker layout can be a daunting task, especially if you're not an audio expert. That's where online speaker placement calculators come in handy.In this comprehensive guide, we'll explore the best ceiling speaker layout calculators available online, including the standout XTEN-AV tool. We'll also delve into the importance of proper speaker positioning, factors to consider when designing your layout, and tips for achieving the best results. Whether you're setting up a Dolby Atmos home theater, a multi-room audio system, or a commercial installation, this article will provide you with valuable insights to optimize your ceiling speaker setup.
Why Proper Ceiling Speaker Placement Matters
Before we dive into the best online tools for calculating your ceiling speaker layout, let's understand why proper speaker placement is so important:- Optimal Sound Coverage: The primary goal of any speaker system is to deliver even sound coverage throughout the listening area. Proper placement ensures that every seat in the room receives a balanced and immersive audio experience, without dead spots or excessive overlapping.
- Minimizing Reflections: Poorly placed speakers can result in unwanted reflections off walls, ceilings, and floors, leading to echoes, distortions, and reduced clarity. Strategic positioning helps minimize these reflections and maintains the integrity of the audio.
- Enhancing Surround Sound: In surround sound systems like Dolby Atmos, the positioning of ceiling speakers is critical for creating a three-dimensional soundscape. Accurate placement allows sounds to seamlessly pan across the room, providing a lifelike and immersive experience.
- Aesthetic Integration: Carefully planned speaker layouts not only optimize audio performance but also blend seamlessly with your room's aesthetics. Proper placement prevents speakers from looking out of place or interfering with other design elements.
Factors to Consider in Ceiling Speaker Layouts
When designing your ceiling speaker layout, several factors come into play:- Room Dimensions: The size and shape of your room significantly impact speaker placement. Square, rectangular, and irregularly shaped rooms each require different considerations to achieve optimal coverage.
- Ceiling Height: The distance between the ceiling and the listener's ear level affects how sound waves propagate. Higher ceilings may require angled speakers or specific placement to direct sound effectively.
- Speaker Specifications: Each speaker model has unique characteristics, such as dispersion patterns and frequency response. Understanding these specs helps determine the ideal spacing and angles between speakers.
- Listening Position: The primary listening area, such as a couch or seating arrangement, should be the focal point of your speaker layout. Aim to provide the best possible audio experience at these key positions.
- Obstacles and Reflective Surfaces: Consider the placement of windows, doors, furniture, and other obstacles that may affect sound propagation. Reflective surfaces like glass or mirrors may require special treatment or speaker positioning.
The Rise of Online Speaker Placement Calculators
Traditionally, designing a ceiling speaker layout required expertise in audio engineering and acoustics. However, the emergence of online speaker placement calculators has made the process more accessible to homeowners, DIY enthusiasts, and even professional installers. These tools simplify the complex calculations and provide visual aids to help you determine the optimal positions for your ceiling speakers.How Speaker Placement Calculators Work
Most online speaker placement calculators follow a similar process:- Room Dimensions Input: You enter the length, width, and height of your room, providing the calculator with the necessary spatial information.
- Speaker Selection: Choose the number and type of speakers you plan to install, such as 5.1, 7.1, or Dolby Atmos configurations.
- Listening Position: Specify the location and height of your primary listening position, such as a couch or seating area.
- Calculation: Based on the provided information, the calculator applies acoustic principles and industry standards to determine the optimal speaker positions.
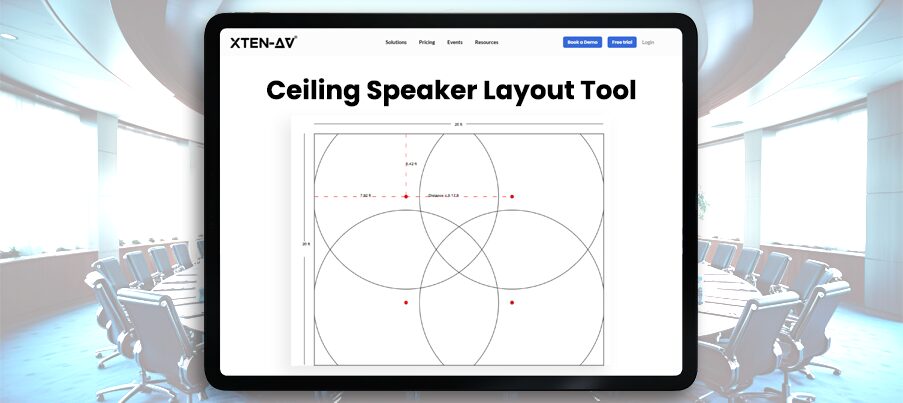
- Visual Output: The results are presented in a visual format, often including a 2D floor plan or even a 3D rendering of your room with the recommended speaker placements.
XTEN-AV: The Standout Ceiling Speaker Layout Calculator
Among the various online speaker placement calculators, XTEN-AV stands out as the best option for several reasons. Let's explore the key features that make XTEN-AV the go-to tool for ceiling speaker layouts:1. Extensive Multi-Brand Compatibility & Vast Product Library
Unlike many competitors, which are limited to specific manufacturers, XTEN-AV offers seamless compatibility across over 1.5 million AV products from more than 5,200 brands. By letting users pick any speaker brand and model, the tool automatically adapts layout calculations to match each speaker's true acoustic characteristics—such as dispersion angle and coverage profile.Why it matters: In real-world projects—especially commercial or hybrid setups—professionals mix brands. XTEN-AV removes the friction of switching between disparate calculators by consolidating all candidates into one intelligent system.2. Precision through Industry-Standard Algorithms
XTEN-AV doesn't rely on guesswork. Its layout engine leverages science-backed formulas that factor in ceiling height, listener ear level, and dispersion angles—often guided by AVIXA/ANSI best practices. It supports multiple coverage patterns such as edge-to-edge, overlap, and edge-to-center, assuring uniform audio coverage without dead zones or excessive overlapping.Why this matters: Delivering consistent, high-quality sound coverage is critical—especially in auditoriums or immersive home theaters. XTEN-AV's precision minimizes installation errors and costly post-installation adjustments.3. Instant 2D & 3D Visualization with Professional Delivery
Once inputs like room dimensions and speaker specs are provided, XTEN-AV instantly produces 2D layouts and immersive 3D visuals. These can be labeled, customized, and exported as professional-grade PDF documents for presentations, proposals, or installation guides.Why it matters: Clear, visual documentation helps align designers, installers, and clients. It reduces miscommunication, speeds up installations, and boosts professional credibility.4. Incredibly User-Friendly—No CAD Skills Required
The tool is built for efficiency: you simply input basic room specs (length, width, height), select your speaker brand/model, and click "Generate." Within seconds, you get a fully mapped layout—no need for complex CAD tools or engineering know-how.Why it matters: Minimal learning curve means even DIYers or less technically inclined professionals can harness its power—saving valuable time and effort.5. Built for Verification & Compliance with Standards
XTEN-AV's calculations align with recognized AVIXA and ANSI standards. This ensures layouts meet acoustic performance thresholds and design benchmarks—bolstering trust and ensuring client expectations are met.Why it matters: When you're pitching to clients or collaborating with other professionals, adherence to standards conveys reliability and professionalism.6. Versatile across Use Scenarios—from Homes to Large Facilities
Whether you're designing a small home theater, a Dolby Atmos setup, a multi-zone commercial environment, or a classroom, XTEN-AV adapts. It supports complex configurations including multi-room audio, immersive formats like Atmos, and varied room geometries.Why it matters: One platform for all needs simplifies the workflow—no jumping between tools based on project type or scale.7. Far Superior to Brand-Specific Tools
Many manufacturers only offer basic calculators limited to their own product lines and often lack robust visual outputs. XTEN-AV eliminates these limitations by offering broad brand support, full visualization, and all-in-one workflow integration.Why it matters: Designers working with mixed setups gain flexibility, speed, and precision—all from one tool—saving them from juggling multiple vendor-specific tools.8. Experienced-Based Praise & Real-World Impact
According to an AV industry source: "XTEN-AV stands out as the best ceiling speaker layout calculator … Its combination of brand flexibility, precision design, intuitive UI, and standards compliance makes it ideal…"From DIY home theater enthusiasts to seasoned AV integrators, users have noted the tool as a "total game-changer" for simplifying complex setups and enabling confidence in the layout results—especially for immersive Atmos systems.How to Use XTEN-AV for Your Ceiling Speaker Layout
Now that we've established why XTEN-AV is the best ceiling speaker layout calculator, let's walk through the process of using it for your project:- Create an Account: Visit the XTEN-AV website and create a free account. This allows you to save and access your layouts from any device.
- Start a New Project: Click on "New Project" and enter a name for your layout. Select the room type (e.g., home theater, living room, commercial space) and specify the dimensions.
- Choose Your Speakers: Browse XTEN-AV's extensive product library and select the ceiling speakers you plan to use. If your specific model isn't listed, choose a similar one or contact support for assistance.
- Define Listening Position: Place the listening position marker on the layout grid, representing your primary seating area or sweet spot.
- Generate Layout: Click the "Generate Layout" button, and XTEN-AV will calculate the optimal speaker positions based on your inputs. The results will be displayed in a 2D floor plan and a 3D room visualization.
- Fine-Tune and Customize: Use the editing tools to fine-tune speaker positions, add labels, or make any necessary adjustments based on your room's unique characteristics or personal preferences.
- Export and Share: Once you're satisfied with the layout, export it as a professional-grade PDF document. You can share this with clients, installers, or use it as a reference during the installation process.
Tips for Optimizing Your Ceiling Speaker Layout
While XTEN-AV provides an excellent starting point for your ceiling speaker layout, here are some additional tips to ensure the best possible results:- Consider Speaker Angling: In some cases, angling your ceiling speakers towards the listening position can enhance directionality and improve the soundstage. XTEN-AV allows you to experiment with different angles to find the sweet spot.
- Avoid Reflective Surfaces: When possible, position your speakers away from large reflective surfaces like windows or mirrors. If unavoidable, consider acoustic treatments to minimize unwanted reflections.
- Integrate Subwoofers: For a truly immersive audio experience, consider adding one or more subwoofers to your setup. XTEN-AV can help you determine the optimal placement for seamless integration with your ceiling speakers.
- Plan for Wiring: Before finalizing your speaker layout, consider the practical aspects of wiring and cable management. Ensure that your chosen positions are accessible and allow for neat and tidy installation.
- Test and Adjust: Once your speakers are installed, take the time to test the system thoroughly. Play a variety of content and listen from different positions in the room. Make any necessary adjustments to achieve the best possible sound.
Ceiling Speaker Layout FAQs
To help address common questions and concerns, here are some frequently asked questions about ceiling speaker layouts:1. How many ceiling speakers do I need for my room?
The number of ceiling speakers required depends on several factors, including the size of your room, the desired level of immersion, and the specific speaker configuration (e.g., 5.1, 7.1, Dolby Atmos). XTEN-AV can help you determine the optimal number based on your room dimensions and layout.2. Can I use different brands of ceiling speakers in the same layout?
Yes, you can mix and match different brands of ceiling speakers in your layout. However, it's important to ensure that the speakers have similar specifications, such as sensitivity and dispersion patterns, to maintain a balanced sound. XTEN-AV's multi-brand compatibility makes it easy to design layouts with speakers from various manufacturers.3. How high should I mount my ceiling speakers?
The ideal mounting height for ceiling speakers depends on your room's ceiling height and the speaker's dispersion characteristics. As a general rule, speakers should be positioned at least 2-3 feet away from walls and corners to minimize reflections. XTEN-AV takes ceiling height into account when generating layouts to ensure optimal sound dispersion.4. Can I use in-ceiling speakers for Dolby Atmos?
Yes, in-ceiling speakers can be used for Dolby Atmos setups. Dolby Atmos is an immersive audio format that utilizes overhead speakers to create a three-dimensional soundscape. XTEN-AV supports various Atmos configurations, such as 5.1.2, 7.1.4, and 9.1.6, and can help you determine the best placement for your ceiling speakers.5. How do I avoid conflicts with recessed lighting or other ceiling fixtures?
When designing your ceiling speaker layout, it's important to consider the placement of recessed lighting, HVAC vents, and other ceiling fixtures. XTEN-AV allows you to input the location of these obstacles in your layout, helping you avoid conflicts and ensuring proper speaker placement.6. Can I use ceiling speakers for a multi-room audio system?
Yes, ceiling speakers are an excellent choice for multi-room audio systems. By strategically placing speakers in different rooms or zones, you can create a seamless audio experience throughout your home. XTEN-AV supports multi-room layouts and can help you optimize speaker placement for each zone.7. Do I need an amplifier for my ceiling speakers?
Most ceiling speakers are passive, meaning they require an external amplifier to power them. The type and size of the amplifier depend on the number of speakers, their power handling, and the desired volume levels. When designing your layout with XTEN-AV, consider the amplification requirements to ensure optimal performance.8. How do I control the volume and source selection for my ceiling speakers?
To control the volume and source selection for your ceiling speakers, you'll need a multi-zone amplifier or a matrix switcher. These devices allow you to independently adjust the volume and select different audio sources for each zone or room. Some systems also offer smart home integration, enabling control through smartphones, tablets, or voice assistants.Real-World Case Studies
To illustrate the impact of proper ceiling speaker layouts and the effectiveness of tools like XTEN-AV, let's explore a few real-world case studies:Case Study 1: Upgrading a Home Theater
John, a home theater enthusiast, wanted to upgrade his 5.1 surround sound system to a more immersive Dolby Atmos setup. He used XTEN-AV to design a 7.1.4 layout, which included four in-ceiling speakers for overhead sound effects. The tool helped him determine the optimal positions for the ceiling speakers, taking into account his room's dimensions and the location of his existing surround speakers.After installing the speakers according to the XTEN-AV layout, John was thrilled with the results. The overhead speakers seamlessly integrated with his surround sound system, creating a truly three-dimensional audio experience. Movies and music came to life with stunning realism, and the placement of the speakers eliminated any dead spots or uneven sound distribution.Case Study 2: Designing a Multi-Room Audio System
Sarah, a homeowner, wanted to create a multi-room audio system that would allow her to enjoy music throughout her house. She used XTEN-AV to design a layout that included ceiling speakers in the living room, kitchen, dining room, and master bedroom. The tool helped her determine the ideal number of speakers for each room and the optimal placement for even sound coverage.Sarah worked with a professional installer to implement the XTEN-AV layout, and the results were outstanding. The ceiling speakers provided clear and balanced sound in each room, and the multi-zone amplifier allowed her to control the volume and source selection independently for each zone. Whether entertaining guests or enjoying a quiet evening at home, Sarah's multi-room audio system delivered a seamless and enjoyable listening experience.Case Study 3: Enhancing a Commercial Conference Room
Michael, an AV integrator, was tasked with designing a ceiling speaker layout for a large conference room in a corporate office. The room had an irregular shape and a high ceiling, making it challenging to achieve even sound coverage. Michael used XTEN-AV to input the room dimensions, select the appropriate speakers, and generate a layout that accounted for the room's unique characteristics.The resulting layout included multiple rows of ceiling speakers, strategically positioned to provide uniform coverage throughout the room. Michael exported the layout as a professional PDF and presented it to his client, who was impressed with the detailed visualization and the adherence to industry standards. The installation went smoothly, and the conference room now boasts exceptional audio quality for presentations, video conferences and video calls
Tips for Installing Ceiling Speakers
While XTEN-AV simplifies the process of designing your ceiling speaker layout, the actual installation can still be challenging, especially if you're a DIY enthusiast. Here are some tips to help you achieve a successful installation:1. Plan for Wiring and Access
Before cutting any holes in your ceiling, carefully plan your wiring routes and consider the accessibility of each speaker location. If possible, use a stud finder to locate joists and avoid drilling into them. Consider using conduit or wire channels to protect and conceal the speaker wires .2. Use the Right Tools
Investing in quality tools can make the installation process much smoother. Essential tools include a stud finder, drywall saw, drill, fish tape or pull rod, wire stripper, and a level. If you're working with insulated ceilings, you may also need a long flexible drill bit to navigate through the insulation.3. Properly Secure the Speakers
When installing the speakers, ensure that they are properly secured to the ceiling. Most in-ceiling speakers come with mounting brackets or clamps that hold them firmly in place. Follow the manufacturer's instructions carefully and test the stability of each speaker before finalizing the installation.4. Seal the Gaps
To prevent air leaks and maintain the integrity of your ceiling, use a sealant or caulk to fill any gaps around the speaker cutouts. This not only improves the speaker's performance but also helps with soundproofing and energy efficiency .5. Test and Fine-Tune
After installing your ceiling speakers, take the time to test them thoroughly. Play a variety of content and listen for any distortions, rattles, or uneven sound distribution. If needed, make minor adjustments to the speaker positions or angles to achieve the best possible sound.Remember, while DIY installation can be rewarding, it's always an option to hire a professional installer. They have the expertise, tools, and experience to ensure a flawless installation, especially for complex setups or challenging room conditions.The Future of Ceiling Speaker Layouts
As technology continues to advance, we can expect to see even more sophisticated tools and techniques for designing and installing ceiling speaker layouts. Some potential developments include:- AI-Driven Optimization: Machine learning algorithms could analyze room characteristics, speaker specifications, and user preferences to generate highly optimized layouts tailored to individual needs.
- Virtual Reality Previews: Imagine being able to put on a VR headset and experience a virtual simulation of your ceiling speaker layout before installation. This could help users make more informed decisions and visualize the impact of different configurations.
- Wireless Audio Integration: As wireless audio technology improves, we may see more options for wireless ceiling speakers that eliminate the need for complex wiring and simplify installation.
- Smart Home Automation: Ceiling speaker layouts could become more integrated with smart home systems, allowing for seamless control, customization, and adaptation to different scenarios or user preferences.