Short Throw vs Long Throw Projectors: Which One Is Right?
Choosing between a short throw vs long throw projector depends on your specific room layout, screen size, mounting preferences, and more. How far should a projector be from the screen? A short throw projector can cast a large image from a very short distance, as little as a few inches from the screen in some cases. A long throw projector requires a greater distance, typically 6 feet or more, to project the same size image
.In this comprehensive guide, we'll explore the differences between short throw and long throw projectors in depth. We'll cover the advantages and disadvantages of each, ideal use cases, example products, and everything else you need to know to choose the right projector type for your needs. By the end, you'll have a clear understanding of short throw vs long throw projectors to help inform your purchasing decision.
What is a Short Throw Projector?
A short throw projector is a type of projector that can cast a large image onto a screen or wall from a very short distance away. While a typical long throw projector needs to be 6 to 10 feet back to project a 100" image, a short throw projector can achieve the same sized image from only a few feet, or even inches in some cases.
Short throw projectors use special lenses and optical systems that allow them to cast a larger image size relative to the throw distance compared to long throw projectors. This makes short throw projectors ideal for smaller spaces where the projector needs to be positioned close to the screen.
There are a few sub-categories of short throw projectors:
- Ultra short throw projectors can be placed extremely close, as little as 0-4 inches from the screen in some cases, while still casting up to a 100"+ image. These often use laser light sources and advanced lenses.
- Standard short throw projectors typically need to be 3-8 feet from the screen for a 100" image. While not as extreme as ultra short throw, this is still a much shorter throw distance than long throw projectors.
- Interactive short throw projectors are designed for education and office use. Many can project onto a whiteboard or table, with interactive touch and stylus input.
The main advantages of short throw projectors are:
- Easier placement in small rooms with limited space
- Reduces shadows and eye glare since the projector is close to the screen
- Less susceptible to people walking in front of the projection
- Mounts above or below a screen so the projector body doesn't obstruct the image
- Interactive models great for collaboration and presentations
Some disadvantages of short throw projectors include:
- Typically more expensive than long throw models with similar specs
- Extreme angle more susceptible to keystoning if not aligned properly
- Often have fewer lens shift and zoom options compared to long throw
- Projector body may still obstruct screen in some setups if not ceiling mounted
Case Study: A homeowner wants to add a 120" projector setup to their small living room for an immersive home theater experience. However, the room is only 10 feet deep, which isn't enough distance for a long throw projector. By choosing an ultra short throw projector, they're able to place the unit on a console just below the screen and still get a huge 120" image that fills their field of view. The short throw distance also prevents shadows when people walk in front of the screen.
What is a Long Throw Projector?
A long throw projector is the most common type of projector. As the name implies, it requires a longer throw distance to project a large image compared to short throw models.
Whereas a short throw projector may only need 3-8 feet of distance to cast a 100" image, a long throw projector typically needs to be positioned 6-15 feet back to achieve the same sized screen, with some models requiring even more distance.
Long throw projectors use more traditional optical systems compared to short throw models. They still cast a bright, high-quality image, but can't bend the light as extremely over a short distance.
Within the long throw category there are a few different types:
- Standard throw projectors have a throw ratio around 1.5-2.5:1 and are the most common type. For a 100" screen, they typically need to be around 8-12 feet back.
- Long throw zoom projectors have a throw ratio higher than 2.5:1, sometimes 4:1 or greater. These need to be even farther back, 12-25+ feet for a 100" screen, making them best suited for very large spaces.
The main advantages of long throw projectors are:
- Lower cost compared to short throw models with equivalent specs and features
- Wider range of lens shift and zoom options for flexible placement
- Less extreme projection angle is more forgiving of imperfect alignment
- Many more models to choose from across all price points
- Well-suited for very large screens and venues
Some disadvantages of long throw projectors include:
- Requires a lot of space between the projector and screen
- Ceiling mounts may obstruct the top of the screen if not positioned far enough back
- More susceptible to shadows and eye glare from people walking in front of the projection
- Not ideal for interactive and collaboration use cases
Case Study: A corporate office is installing a projector in a large 1000 sq ft training room to present to groups of up to 50 people. The space has a deep 25 foot length from the back of the room to the 150" motorized projection screen. Given the large space and audience size, a long throw zoom projector with a throw ratio around 4:1 is ideal. This allows the AV team to ceiling mount the projector at the very back of the room, ensuring an unobstructed image for all viewers. A short throw model would not be able to fill such a large screen size from the back of this deep room.
Importance of Short Throw and Long Throw Projectors
Both short throw and long throw projectors serve important roles in home and professional AV setups. The right type of projector is critical for achieving an optimal viewing experience in a given space.
Short throw projectors have become increasingly popular in recent years due to the growing demand for big screen viewing in small spaces. Many people want a 100"+ screen for an immersive experience, but don't have a very deep room to accommodate the 10-15 foot throw distance of a long throw projector. Ultra short throw models solve this problem by being able to cast a massive image from only inches away. This has made projection a viable option for compact spaces like apartments, dorm rooms, small meeting rooms, and more.
Long throw projectors remain highly relevant as well. In larger spaces like auditoriums, conference halls, churches, and lecture halls, a long throw model is necessary to properly fill a big screen, with some able to create 300"+ sized images. Long throw provides more flexibility as well, with a wider range of lens shift and zoom to accommodate different ceiling placements and room layouts. And they are often more cost-effective for simple presentation and signage use cases where the shortest throw distances aren't needed.
Ultimately, it's important to choose the right projector throw distance for your space, screen size, and use case. Attempting to use a long throw projector in too small of a room will create an awkwardly small image or require the projector to be mounted behind the viewing area. A short throw model in a large space won't be able to cast a big enough picture to fill the screen. Carefully consider your requirements and measure out the space to determine which throw distance will provide the best experience.
Factors That Determine Projector Throw Distance
There are a few key factors that determine how far a projector needs to be from the screen, known as the throw distance:
1. Throw Ratio The throw ratio is the key spec that defines a projector's throw distance. It's determined by the projector's lens and is expressed as a number, like 0.5:1 or 2.5:1.Throw ratio is calculated by dividing the throw distance by the screen width. For example, a projector with a throw ratio of 2:1 needs to be 10 feet back from a 5 foot wide screen (10 divided by 5 equals 2).Short throw projectors have throw ratios less than 1:1, often in the 0.3:1 to 0.8:1 range. This means they can cast a very wide image from a short distance.
Long throw projectors have throw ratios greater than 1:1, typically falling between 1.5:1 to 4:1 or higher. These need to be farther back to create the same screen size.Some projectors have zoom lenses that allow for a range of throw ratios, providing more flexible placement options. For example, a long throw zoom projector may have a throw ratio of 2.5-4.0:1, allowing the projector to be positioned anywhere from 12.5 to 20 feet back for a 5 foot wide screen.
2. Screen Size The screen size also impacts the throw distance, since larger screens require the projector to be farther back with a long throw model.To calculate the throw distance, you multiply the screen width by the throw ratio. So for a 4:1 long throw projector and a 10 foot wide screen, the projector would need to be 40 feet back (10 x 4).Short throw projectors are less impacted by screen size. While they still need to be a bit farther back for a larger screen, the throw distance is compressed. A 0.5:1 short throw projector only needs to be 5 feet back for that same 10 foot wide screen.
3. Resolution The projector's native resolution can also influence the ideal throw distance and screen size pairing. Lower resolution projectors, like 720p and 1080p models, can use smaller screens and closer throw distances while still providing sufficient pixel density for a sharp image. The larger pixels are less noticeable when the screen is smaller or farther from the viewing area.4K and 8K projectors have much smaller pixels, allowing them to be paired with very large screens while still looking exceptionally sharp and detailed. The higher resolution can also make the grid between pixels less noticeable if viewers are sitting close to the screen. This allows 4K and 8K long throw projectors to use bigger screens in large venues compared to 1080p models.
4. Room Size and Layout The room size and layout are key practical considerations that determine what throw distance will work best. In smaller rooms, short throw projectors are often necessary to achieve a large screen size relative to the limited space. A 10 foot deep room simply isn't big enough for the throw distance required by most long throw models to create a 100"+ image.
In large venues, long throw projectors are ideal for filling big screens from a greater distance. The projector can be placed at the back of the space, ensuring an unobstructed image for all viewers.
Other elements like windows, ceiling height, and viewing angles also impact the optimal projector placement and throw distance for a particular room. Carefully measure out the space and calculate the throw distances to determine which setup will work best before making a purchase.
Advantages of Short Throw Projectors
Short throw projectors offer several advantages over their long throw counterparts:
1. Space Saving Design The biggest benefit of short throw projectors is their ability to cast a large image from a very short distance. This is a major advantage in small rooms where space is limited.
For example, a short throw projector with a 0.5:1 throw ratio only needs to be 5 feet away from a 120" screen. In contrast, a long throw 2:1 projector would need to be 20 feet back for that same screen size - a distance that may not even be possible in a small room.
This space-saving design makes short throw projectors ideal for apartments, dorm rooms, small meeting spaces, and other compact areas where a very large screen is desired. The projector can be placed on a short media console or wall mounted just below the screen, taking up minimal room.
2. Reduced Shadows and Eye Glare Another benefit of the short throw distance is a reduction in shadows and eye glare caused by people walking in front of the projection.
With a long throw setup, anyone moving around the room may cast a shadow on the screen or get blinded by looking into the projector's lens. This can be distracting for viewers and presenters.
Short throw projectors are less prone to these issues since the light is being cast at a steep angle just above or below the screen. People can move around the room more freely without impacting the image.
This makes short throw a good choice for interactive presentations, classrooms, and other use cases where people may be moving around near the screen. The short throw angle creates a more uninterrupted viewing and presenting experience.
3. Easier Ceiling or Wall Mounting Short throw projectors are generally easier to mount to the wall or ceiling compared to long throw models.
The short throw distance allows the projector to be placed just above or below the screen on the wall, or in a recessed ceiling box. This keeps the projector body from obstructing the image - a common issue with ceiling mounted long throw projectors that aren't positioned far enough back.
Wall and ceiling mounts also keep the projector out of the way and reduce clutter compared to a media console or credenza placement. This can create a very clean and professional look for a home theater or meeting room.
Some ultra short throw projectors are even designed to look like modern art or decor when wall mounted, allowing them to blend seamlessly into a variety of spaces.
4. Increased Portability While not universally true, many short throw projectors are designed with portability in mind. Compact short throw models are easier to pack up and transport than bulkier long throw units.
The short throw design means you can easily set up a large screen viewing experience on the go, even in small spaces. This is useful for traveling presentations, outdoor movie nights, and other mobile use cases.
Some portable short throw projectors are even battery powered, providing a completely wire-free experience. Simply place the projector in front of a wall or screen and start watching without needing to worry about outlet access.
Of course, there are also very large, installation-focused short throw projectors that are meant to be permanently mounted. But in general, short throw lends itself well to portable applications
.5. Interactivity Features Select short throw projectors are built with interactivity as a key feature. These models are popular in classrooms and meeting spaces to enhance presentations and collaboration.
The short throw design allows for a presenter or participant to get close to the screen without casting a shadow. Many interactive short throw projectors have touch sensors or stylus inputs that allow for writing and drawing directly on the projected image. Some can even turn any wall or table into an interactive surface.
Features like multi-touch support, palm rejection, and interactive whiteboard software are common on these models. The result is an engaging experience that's great for brainstorming sessions, lectures, and group work.
While interactive projectors are less common for home theater use, they offer exciting possibilities for presentations, education, and business settings.
Disadvantages of Short Throw Projectors
While short throw projectors have many benefits, there are some potential drawbacks to consider as well:
1. Higher Cost One of the biggest disadvantages of short throw projectors is their higher cost compared to long throw models with similar specs.
The advanced lenses and optical elements required to cast a large image from a short distance are expensive. This is especially true for ultra short throw projectors that use specialized folded lens systems and laser light sources to achieve very low 0.3:1 or less throw ratios.
As a result, short throw projectors often cost significantly more than long throw models with equivalent resolution, brightness, and features. It's not uncommon to see short throw projectors that are 2-3x the price of a comparable long throw unit.
For budget-sensitive buyers, the higher cost can be a major factor when deciding on short throw vs long throw. The space-saving benefits may not be worth the price premium in some cases.
2. Extreme Projection Angles The steep projection angle used by short throw projectors can also lead to some issues if the setup isn't carefully aligned and calibrated.
With the projector positioned so close to the screen, even small alignment errors can lead to a trapezoidal or "keystone" shaped image. This is caused by the projected light hitting the screen at an angle, creating uneven distortion.
Most short throw projectors have keystone correction settings to digitally adjust for this. However, significant keystone correction can lead to some loss in image quality and resolution. Getting the geometry and alignment of the projector just right relative to the screen is important for the best picture.
Some short throw projectors also have limited lens shift compared to long throw models. This can make it trickier to get the image perfectly centered on the screen if the projector placement is off by a bit.
The extreme angles can also lead to some image artifacts like "hot spots" or visible banding if the screen material isn't perfectly smooth and uniform. Proper screen selection is key for the best short throw experience.
3. Limited Placement Flexibility While short throw projectors are great for tight spaces, they don't offer as much placement flexibility as long throw models in bigger rooms. In large venues, short throw projectors may not be able to cast a big enough image to fill the space. Even with a high gain screen, the maximum screen size may be limited by how far back the projector can be placed in the room.
Long throw projectors have the advantage of being able to be positioned much farther from the screen, allowing for very large images in spacious environments. They also often have more flexible lens shift and zoom options to accommodate different ceiling heights and room layouts.
Some short throw projectors also have limited vertical offset, meaning the image can only be shifted slightly above or below the centerline of the lens. This can make it harder to avoid obstacles like furniture or people's heads when tabletop mounting the projector.
For very large spaces and screens, a long throw projector will typically offer more placement flexibility to achieve the desired sized image.
4. Potential for Obstructed Image Another consideration with short throw projectors is the potential for the image to be blocked by the projector body itself in some setups.
With the projector positioned so close to the screen and at a steep upwards or downwards angle, the projector chassis may obstruct part of the image if not mounted properly. This is especially true for ultra short throw models placed directly below the screen.
Ceiling mounting the projector is often the best way to avoid this issue, but requires additional installation work and may not be feasible in all spaces. Placing the projector on a low media console is another option, but the console needs to be short enough to not block the image.
Long throw projectors are less prone to image obstruction since they are positioned farther away from the screen. The projector body is less likely to block the light path, even when placed on a taller stand or shelf.
5. Fewer Models to Choose From A final drawback of short throw projectors is that there are simply fewer models on the market compared to long throw options.
Long throw projectors have been the most common type for many years, resulting in a very wide selection across all price points and feature sets. There are long throw models for every use case, from compact portable units to high-end home theater projectors to large venue installation models.
Short throw projectors are a newer technology and represent a smaller portion of the overall market. While the selection has grown significantly in recent years, there are still less options to choose from, especially at lower price points.
This can make it harder to find the exact combination of specs and features you're looking for in a short throw model. Buyers may need to compromise on certain preferences or step up to a higher price tier to get the desired short throw setup.
Advantages of Long Throw Projectors
Long throw projectors remain a popular choice for many applications due to several key advantages:
1. Lower Cost One of the biggest benefits of long throw projectors is their lower cost relative to short throw models with comparable specs.
The simpler lens systems used in long throw optical designs are less expensive to manufacture. This allows for long throw projectors to offer similar brightness, resolution, and features as short throw units at a significantly lower price point.
For example, a basic 1080p long throw projector may cost $500-1000, while a short throw model with the same core specs could be $1500+. For buyers on a budget, the savings can be substantial.
Cost is often a primary factor when choosing a projector for applications like a home theater, office presentation space, or classroom. Long throw models can help stretch the budget further.
2. Flexible Lens Options Another advantage of long throw projectors is the wide range of lens options available on many models.
Higher-end long throw projectors often have interchangeable lens systems that allow for different throw ratios, zoom ranges, and lens shift. This provides flexibility to accommodate different room sizes and installation scenarios.
For example, a large venue projector may offer optional lenses ranging from a short 1.5:1 throw ratio up to a very long 8.0:1 throw ratio. This allows the same projector model to be used in a variety of spaces and screen sizes.
Lens shift is another useful feature found on many long throw projectors. This allows the image to be shifted horizontally or vertically without moving the projector itself, making it easier to align the picture on the screen.
Some high-end long throw projectors have motorized lens shift and zoom, allowing for easy adjustment using a remote control. This can speed up installation and make it simple to switch between different screen sizes and aspect ratios.
3. Easier Alignment and Setup Long throw projectors are generally easier to align and set up than short throw models thanks to their less extreme projection angles.
With the projector positioned farther away from the screen, small alignment errors have less of an impact on the geometry and focus uniformity of the image. The picture is less likely to look trapezoidal or have focus issues in the corners.
This can make it quicker to get a long throw projector up and running optimally. Less time needs to be spent fine tuning the physical placement and angle of the unit to dial in the image.
Long throw projectors are also more forgiving of imperfect screen surfaces. Minor ripples or texture variations are less likely to create visible artifacts than with a short throw setup.
Of course, very careful alignment is still important for the best picture possible. But in general, long throw projectors are more flexible and user-friendly to install.
4. Versatility for Different Environments Long throw projectors are highly versatile and well-suited for a wide range of environments and use cases.
In a home theater, a long throw projector can be ceiling mounted at the back of the room for a clean, unobtrusive look. The projector body is less likely to block the image than a short throw model placed closer to the screen.
For a large lecture hall or auditorium, long throw projectors are often the best choice to fill a big screen from a greater distance. The projector can be placed at the back of the space, ensuring good sightlines for all viewers.
Long throw models are also a great option for outdoor movie nights and backyard theaters. With a powerful enough projector, a very large screen can be used from a far throw distance, allowing for comfortable viewing even with a big crowd.
And for digital signage and retail displays, long throw projectors can be mounted high out of view to create an eye-catching image. The flexible lens options and high brightness of commercial models make them adaptable for a variety of signage applications.
5. Extensive Model Selection A final big advantage of long throw projectors is the extensive selection of models available on the market.
Long throw projectors have been the most common type for many years, resulting in a huge range of options across all price points, performance levels, and feature sets. This makes it easier for buyers to find the exact projector that matches their needs and budget.
There are long throw models with resolutions from 480p up to 8K, brightness levels from under 1000 lumens to over 30,000 lumens, and prices from under $500 to $50,000+. Buyers can choose from entry-level budget models up to specialized high-performance units.
This wide selection is especially beneficial for applications that have specific requirements, like blending multiple projectors, motion simulation, or 3D visualization. Niche features and specs are more readily available in the long throw market.
While the short throw category has expanded a lot in recent years, it still doesn't match the sheer breadth of options available in long throw. For the most flexibility and choice, long throw remains the way to go.
Disadvantages of Long Throw Projectors
Despite their many benefits, there are some potential downsides to long throw projectors worth considering:
1. Requires a Large Space The biggest limitation of long throw projectors is the large amount of space they require relative to the screen size.
For a 100" screen, a long throw projector may need to be positioned 10-15 feet or more from the screen. This simply isn't feasible in a small room.
In a home theater or living room setup, this may mean the projector has to be placed behind the seating area, which can be awkward and limit the screen size. Or the projector may need to be ceiling mounted very high up, which can be tricky to install and service.
For presenters that need to travel with a projector, the long throw distance can also be problematic in small conference rooms and hotel spaces. There may not be enough distance available to cast a sufficiently large image for all attendees to see clearly.
The large space requirements are the main reason ultra short throw projectors have become popular for home theaters and portable presentation use cases. The ability to get a big picture from just inches away is a huge benefit in space-limited environments.
2. Shadows and Eye Glare Another potential issue with long throw projectors is the increased likelihood of shadows and eye glare from people walking in front of the screen.
Since the projector is positioned farther back in the room, any movement between the lens and the screen will cast a shadow on the image. This can be distracting for viewers and disrupt presentations.
Ceiling mounting the projector can help reduce shadows somewhat. But in some setups, like a low ceiling or a projector positioned at the back of a conference table, shadows may still be unavoidable.
Eye glare can also be a problem if a presenter or audience member accidentally looks directly into the projector's lens. The bright light can be blinding, making it difficult to see and causing eye strain.
Short throw projectors are less prone to shadows and glare issues since the steep projection angle keeps the light beam above people's heads. This can make for a more comfortable viewing and presenting experience.
3. Potential Installation Challenges Installing a long throw projector can come with some challenges depending on the room layout and desired setup.
Ceiling mounts are a popular choice for a permanent long throw installation. But this requires routing power and signal cables through the ceiling, which can be difficult and time-consuming. Professional installation may be needed to safely secure the projector and conceal the wiring.
Vaulted or angled ceilings can also complicate a ceiling mount. The projector may need to be positioned off-center or at an angle to the screen, which can affect image geometry and uniformity.
Rear shelf placement behind the seats is another option. But this limits the screen size and may require a small platform or hush box to raise the projector up high enough to clear viewers' heads.
Even with a simple tabletop setup, cable management can be tricky with the projector positioned far from source devices and power outlets. Long cable runs may be required, which can create trip hazards if not routed properly.
Short throw projectors are often easier to place on a low cabinet or wall-mount below the screen. The short distance requires less cabling and reduces installation complexity.
4. Larger Projector Size and Weight Long throw projectors, especially high-performance models, are often larger and heavier than their short throw counterparts.
The bigger lens systems required for long throw projection take up more space. And brighter long throw models need larger chassis to accommodate the lamps, cooling systems, and power supplies.
This can make long throw projectors more difficult to move and transport. They may require a wheeled cart or multiple people to safely carry and position the unit.
The size and weight can also limit placement options. A heavy long throw projector may require a reinforced ceiling mount or sturdy shelf to support it securely. And in some cases, the projector may simply be too large to fit in the desired location
.Ultra short throw projectors are often slim and relatively lightweight by comparison. This makes them easier to move around and place in a variety of settings without special mounts or supports.
5. Limited Screen Size in Some Spaces A final potential downside of long throw projectors is the limited maximum screen size in some rooms.
While long throw is great for very large screens in spacious environments, the throw distance requirements may limit the biggest possible screen size in small to mid-sized rooms.
For example, in a living room with a 10 foot distance from the back wall to the screen wall, a long throw projector with a 2.0:1 throw ratio could only create a maximum 60" diagonal 16:9 image. Anything larger wouldn't fit within the available throw distance.
In this scenario, a short throw projector would allow for a much larger screen size. A 0.5:1 short throw model could cast a 120" diagonal image from the same 10 foot distance.
So while long throw is great for supersizing the screen in large spaces, it may be more limited in residential and small business environments. The specific room dimensions and layout will dictate the biggest screen size that's possible with a long throw setup.
How to Determine the Right Throw Distance for Your Needs
With the various advantages and disadvantages of short throw and long throw projectors in mind, how do you determine which option is best for your specific needs? Here's a step-by-step process to help choose the right throw distance:
1. Measure the Room Dimensions The first step is to carefully measure the dimensions of the room where the projector will be used. The key measurements are:
- Distance from the screen wall to the opposite wall (throw distance)
- Width of the screen wall
- Ceiling height
- Any obstructions like columns, furniture, or walkways
2. Determine the Desired Screen Size Next, think about the ideal screen size for the room and application. Consider factors like:
- Viewing distance from the seats to the screen
- Number of viewers and seating layout
- Type of content (movies, sports, presentations, etc.)
- Ambient light levels in the room
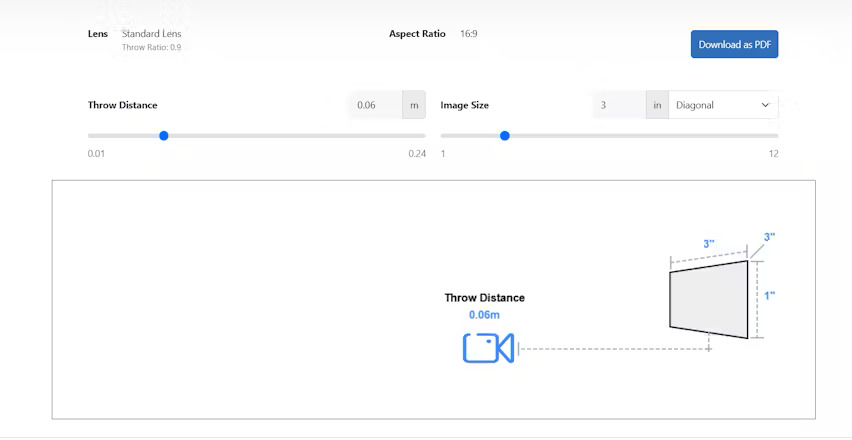
3. Calculate the Throw Ratio With the room dimensions and desired screen size determined, you can calculate the required throw ratio for the projector. First, convert the screen diagonal to width. For a 16:9 screen, multiply the diagonal by 0.87. So a 100" diagonal screen is about 87" (7.25 feet) wide.
Then, divide the throw distance by the screen width to get the throw ratio. Continuing the example above, if the projector will be placed 15 feet back from a 100" screen, the throw ratio would be 15 / 7.25 = 2.07:1.Repeat this calculation for the minimum and maximum possible throw distances in the room to get a range of suitable throw ratios.
4. Evaluate Short Throw vs Long Throw Now compare the calculated throw ratios to the typical ranges for short throw and long throw projectors:
- Ultra short throw: 0.3:1 or less
- Short throw: 0.4:1 to 1:1
- Long throw: 1.5:1 and up
For throw ratios between 1:1 and 1.5:1, either a short throw or long throw projector may work depending on the specific installation and room layout.Also consider other factors like budget, desired image quality, installation complexity, and portability needs when evaluating short throw vs long throw.
5. Research Specific Projector Models Once you've determined whether a short throw or long throw projector is best suited for the space, start researching specific models that match the required throw ratio and other criteria.
Pay attention to the throw ratio range listed in the projector's specs. Some models have zoom lenses that allow for a range of throw distances. Others may offer interchangeable lens options to fit different room sizes.
Read reviews and compare models to find the best combination of image quality, features, and price for your needs. Look for a projector with sufficient brightness for the ambient light level in the room, as well as good contrast and color accuracy
.If the projector will be permanently installed, consider models with motorized lens shift and zoom for easier adjustment. For portable use cases, look for a lightweight and compact design with simple setup.
6. Consider Hiring a Professional Installer For complex installations or high-end setups, it may be worth hiring a professional projector installer to help with the planning and execution.
An experienced installer can evaluate the room layout, recommend the best projector and screen options, and handle the mounting and calibration process. They can also advise on factors like power and signal cable routing, network connectivity, and acoustics.
While professional installation adds cost to the project, it can save a lot of time and headaches, especially for novice users. A properly installed and calibrated system will deliver the best possible image quality and reliability.
Many specialty AV retailers offer installation services or can recommend local professionals. Look for an installer with experience in the specific type of projector and room environment you're working with.
Conclusion
Choosing between a short throw and long throw projector ultimately comes down to the specific room dimensions, screen size, and installation constraints of the project.
Short throw projectors are best suited for small to mid-sized rooms where space is limited. They can cast a large image from just a few feet away, making them a great option for home theaters, small conference rooms, and portable presentation setups. Short throw models also tend to have less issues with shadows and eye glare compared to long throw.
Long throw projectors are ideal for larger spaces like auditoriums, lecture halls, and event venues. They can project very large images from a greater distance, allowing for optimal screen sizing and placement flexibility. Long throw models also tend to be less expensive than short throw for similar image quality and features.
When deciding on the right projector throw distance, start by measuring the room dimensions and determining the desired screen size. Calculate the required throw ratio and compare it to the typical ranges for short throw and long throw projectors. Consider factors like budget, installation complexity, and portability needs as well.
Case Study 1: Home Theater in a Small Living Room John wants to set up a projector-based home theater in his small living room. The room is 10 feet wide and 15 feet long, with an 8-foot ceiling. He wants the biggest possible screen for an immersive movie watching experience.
Given the limited space, a short throw projector is the best option for John's setup. With a 0.5:1 throw ratio, he can achieve a 100" diagonal screen from just 5 feet away. This allows him to place the projector on a low media console in front of the seating area, without the projector being obtrusive or casting shadows.
John selects a 4K laser short throw projector with built-in streaming apps and speakers. The projector's compact size and simple setup allow him to easily install it himself. The result is a big screen cinematic experience in a small room that impresses all his guests.
Case Study 2: Conference Room Presentations Sarah is an IT manager tasked with selecting a projector for her company's main conference room. The room is 20 feet long and 15 feet wide, with a 10-foot ceiling. The projector will be used for presentations, video conferencing, and training sessions with up to 20 attendees.
Sarah decides a long throw projector is the best fit for the room. With the seats starting about 5 feet back from the screen wall, a 2.0:1 throw ratio will allow for a 120" diagonal screen that's easily visible for all participants.
She selects a 5000-lumen 1080p projector with motorized lens shift and zoom. This allows the projector to be ceiling mounted at the back of the room, out of the way of foot traffic and presenters. The motorized lens makes it easy to adjust the image position and size without using a ladder.
Sarah also adds an ultra short throw interactive projector to the smaller breakout room for collaborative brainstorming sessions. The ability for participants to write and draw on the projected image enhances the meeting experience.
User Query 1: Outdoor Movie Night Projector Placement
"I want to host an outdoor movie night in my backyard, projecting onto a 120" screen. The yard is about 30 feet deep. Where should I place the projector and what throw ratio do I need?"
For a 120" diagonal 16:9 screen, the width is about 105 inches (8.75 feet). To find the minimum throw distance, multiply the screen width by the minimum desired throw ratio. For a long throw projector with a 1.5:1 minimum throw ratio, the projector should be at least 13 feet back from the screen (8.75 * 1.5).Assuming you want some flexibility in case the projector needs to be moved back farther, look for a model with a throw ratio range of about 1.5:1 to 2.5:1 or higher. This will allow you to place the projector anywhere from 13 to 22 feet back from the screen.
You'll also want a projector with high brightness (at least 3000 lumens) to compete with the ambient light outdoors. A model with built-in speakers or an audio output jack for external speakers will make setup easier as well.
User Query 2: Classroom Projector for Detailed Diagrams "I need a projector for my high school science classroom to show detailed diagrams and experiments. The room is small, only about 15 feet deep, but I want the biggest possible image so students can see clearly. What are my options?"
Given the small room size, an ultra short throw projector is likely the best choice. Look for a model with a 0.3:1 throw ratio or less, which will allow you to create a 100"+ diagonal image from just a couple feet away. This will give your students a large, clear view of the detailed diagrams.
Since you'll be showing intricate content, prioritize resolution and image quality in your projector choice. A WUXGA (1920 x 1200) or 4K model will offer the sharpest picture for text and fine details.
Also consider a projector with interactive features like touch input and whiteboarding software. This can allow you and your students to annotate and manipulate the diagrams in real time for a more engaging learning experience
.Brightness is less of a concern in a small classroom setting. A 3000-4000 lumen model should be sufficient, even with some ambient light in the room.
Final Thoughts
Selecting the right throw distance is a crucial factor in creating an effective and enjoyable projection setup. By carefully evaluating your room size, seating layout, content type, and installation preferences, you can narrow down your choices to short throw or long throw models that will fit your needs.
Don't hesitate to consult with a professional installer or experienced AV retailer if you need additional guidance. They can provide personalized recommendations based on your specific situation and budget.
With the right projector throw distance and installation, you can create a stunning big screen experience in any setting - from a cozy home theater to a spacious auditorium. The key is taking the time to understand your requirements and evaluate your options carefully. By following the steps and advice in this guide, you'll be well on your way to projection success.